Table of Contents
Solo Dungeons
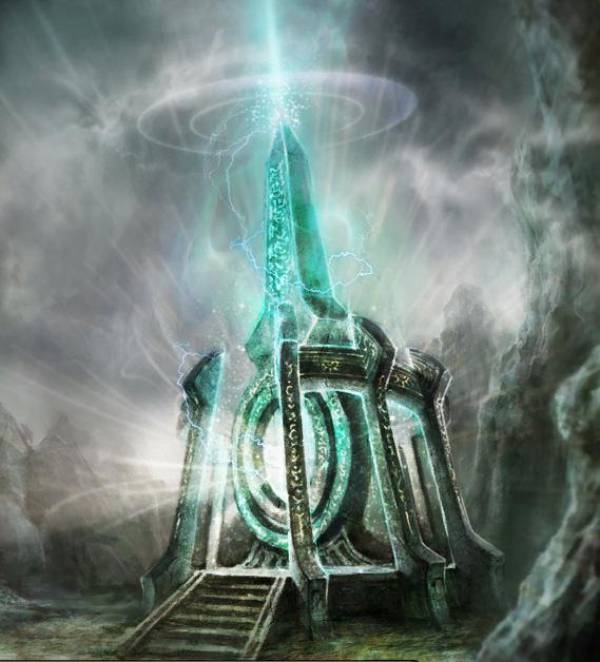
Norak Secret Arena
Level: 71+
Map: Norak Cave
Entry Fee: Norak Secret Arena Ticket
3/day complementary
3/day - 1 Camouflage or 2 Super Pass each
Time Limit: 7 minutes
Rewards:
- Title: Taste of Combo – All ATT 125
- Davich’s Earring +10
- Blood Circulation Jade Bracelet (3D or perm)
- Davich’s Ring
About:
The earliest dungeon players are likely to encounter. Endure repeating waves of attacking creatures until the boss appears. By killing monsters quickly, you'll build up a higher combo rating, which pays off with extra experience points. With three free tickets per day, this is a good dungeon to come back to for a while as you level up.
Davich’s Earring +10 is a decent earring which will last you for a long time, and is even more potent if worn in a pair. Keep grabbing them when you find them, as there are a variants with higher stats.
Davich’s Ring is a rare but useful accessory. You can upgrade it via crafting with Kardia, which is also found in Norak Secret Arena.
You will often receive a Blood Circulation Jade Bracelet which lasts for three days, but sometimes you will get lucky and discover a permanent version.
Python Dungeon
Level: 118+
Map: Doomed Maze
Entry Fee: Python Palace Entrance Ticket
1/day complementary
3/day - 1 Camouflage or 2 Super Pass each
Time Limit: 30 minutes
Rewards:
- Title: Savior - Heal 25
- Title: Lucky Guy – MP Consumption Res: 1%
- Amethyst
- Topaz
- Tourmaline
About:
There are two paths you can take to fight through Python Dungeon to reach Deux Marble.
Entering the central door in the castle courtyard takes you through the Underground Prison route, where you can clear dozens of prison wardens and earn a title. You'll find Sumatra Choi down here, if you've been tasked to rescue him.
You can also bypass the prison and enter the Escort Lounge through the door in the Northeast corner of the courtyard. There's a small chance of earning another title here, if you're lucky, and the experience is better if you can handle it.
Especially bold players can skip both of these routes and run directly to Deux Marble's Antechamber, but he'll be a more formidable challenge than if you'd gone the long way.
Deux Marble is a good source of reinforced equipment. He carries rare gems which are sought by Idinos in Ardeca.
Elleghos
Level: 140+
Map: Space of Pilgrimage
Entry Fee: Elleghos Entrance Ticket
1/day complementary
3/day - 1 Camouflage or 2 Super Pass each
Time Limit: 30 minutes
Rewards:
- Title: YOLO – Defense 500
- Title: Spirit Summoner – (M) Damage Tolerance 2%
- Elleghose RandomBox
- Wings of Fate
- Crystal of the Frigid
- Crystal of the Raged
About:
Brave the anguished spirits of Trieste's fallen heroes, and challenge the otherworldly Illias and its reincarnations before they grow too powerful from feeding on noble spirits.
You can skip most of Elleghos and face the boss right away, but clearing the dungeon provides good experience for a time. All creatures in the dungeon have a chance to drop Crystal of the Frigid and Crystal of the Raged when killed, which are used in powerful crafting.
When Illias is defeated, you have the option of summoning another more powerful boss who uses the same attacks, and repeating again until you defeat the fourth and final boss. However, each stage assumes you are about ten levels higher than the previous, so if one boss is a challenge, it's probably too dangerous to attempt the next. Beating all four will award you the YOLO title.
Rezeena will give you a random item when you depart, which may include the rare crafting material Naruke.

Nunvice Temple
Level: 145+
Map: Crespo
Entry Fee: Entry Fee: Temple of Nunvice Ticket
1/day complementary
2nd - 4th - 2 Super Pass (additional tickets after 1st also require purchaser to be under effects of Holy Water of Almighty)
5th - 7th - 4 Super Pass
8th - 10th - 8 Super Pass
Time Limit: 30 minutes
Rewards:
- Title: Oh! My goddess – Max HP: 1000
- Nunvice's Ring +10
- Relic of the Goddess[Fang]
- Relic of the Goddess[Thread]
- Relic of the Goddess[Gem]
About:
You'll need to fully explore the branching passages of Nunvice Temple to destroy the Shaman Stones and reveal Wrath Vine.
Wrath Vine herself drops one of three Relics of the Goddess. You must obtain one of each before you can summon and face Vine, the true boss of the dungeon. Both can drop Nunvice's Ring, but Vine is more likely to do so.
If you explore the side passages, you can often find treasure chests which grant extra DIL. And if you can bring yourself to summon and slay Vice no less than 50 times, you'll receive the Oh! My goddess title.
Umbar’s Counterattack
Level: 150+
Map: The Deadlands (Capelia)
Entry Fee: Sign of Wrath
You must complete a series of quests, starting with Garion From the Future, in turn allowing access to a series of daily quests, starting with Coerth, which reward one Sign of Wrath.
Time Limit: 15 minutes
Rewards:
Dark Blood
About:
The series of quests necessary to obtain the Sign of Wrath, needed to summon Umbar just once, is probably more work than the fight with the demonic general himself. Nevertheless, you’ll earn a good amount of Main Quest experience for defeating him at least once.

Dravice Secret Passageway
Level: 160+
Map: Ellonom Sanctum
Entry Fee: Dravice Secret Passage Entrance Ticket
1st - 4th/day – 200,000 DIL
5th/day – 300,000 DIL
6th/day – 400,000 DIL
7th/day – 500,000 DIL
Time Limit: 30 minutes
Rewards:
- Title: A Lucky Mascot – MP Consumption Res: 1%
- Title: A Destructive Instinct – All ATT: 125
- Mysterious Pendant
- Slime Mucus
- Maneuver’s Magic Crystal
- Dragon Scale
About:
The biggest draw to this hidden underground maze is the various materials needed for the Dragonic Squama, a powerful defensive accessory. But you will need to attempt this dungeon many times before you gather enough of the necessary items.
Be prepared for a few puzzles and obstacles. Dodge a ramp of deadly rolling boulders to reach and destroy the wall at the top. Collect badges from Dravice guards to decode the way to a shortcut (or just smash your way through), and navigate a maze that changes every time you enter.
You’ll need to process a Dragonoid Signet into Dream Powder in order to access Rubisin, the true boss of the dungeon, and the Dragon Scale he carries.


Favnil’s Nest
Level: 168+
Map: Dravice Village (Ancient Presence)
Entry Fee: Favnil’s Nest Admission Ticket
1/day complementary
3/day - 1 Camouflage or 2 Super Pass each
Time Limit: 30 minutes
Rewards:
- Lava Stone
- Dragonoid Signet
- Favnil's keep RandomBox
About:
The dragon Favnil carries a treasure horde befitting his might. But he is primarily sought out for the Lava Stones he carries, which are used in the creation of the legendary Qune’s Earring.
The path through Favnil’s lair is a short one, but if you’re having trouble defeating him, you can take the left or right path after defeating the Lizard King, and receive a defense buff before the final encounter. If you’re confident that you can win without help, take the straight route to save time.
Death Corridor
Level: 1+ (170+ needed to equip emblem)
Map: Ardeca (Butler Alfredo)
Entry Fee: Death Corridor Entrance Ticket
1/day complementary
2nd & 3rd – 2 Super Pass
4th & 5th – 4 Super Pass
Time Limit: 60 minutes
Rewards:
- Title: Greedy One – Max HP: 1000
- Title: Suffering Corridor – All ATT: 125
- Circulation Emblem
- Circulation Argate (I through V)
About:
The people of Ardeca are content to leave the eccentric self-proclaimed Doll Master Belicas, sealed in his tower with his animate unliving creations. But a 50-storey tower filled with creatures and treasure is not something that a Dekaron could pass up.
Death Corridor tasks players to make their way up a tower, one circular corridor at a time. Each level challenges players to clear its doll inhabitants, which grow stronger as one ascends, or to avoid a nightmarish arrangement of deadly traps. Every fifth floor features a stronger boss encounter, each of whom possesses a Circulation Argate. Doll Master Belicas himself awaits Dekarons who reach the top.
These Argates are only used in upgrading the Circulation Emblem, which can be obtained from Marielle, near the entrance. This emblem isn’t very impressive when you receive it, but it can be upgraded by blacksmiths up to 50 (fifty!) times, using Circulation Argates. Be wary that while each success raises the emblem’s level by one, failure drops it. And there are five tiers of Argates, each only usable for upgrading within a ten level range.
Death Corridor features three levels of difficulty, with 30, 40, and 50 floors each. Higher difficulties and levels result in more experience and better Circulation Argates. Clearing Easy and Normal level both grant you titles, too.
Sacred Claw
Level: 175+
Map: Dravice Field
Entry Fee: Death Corridor Entrance Ticket
1st/day - 250,000 DIL
2nd & 3rd – 2 Super Pass
Time Limit: 30 minutes
Rewards:
- Dragon Claw
- Sal Crystalline
- Dragon Horn
- Corrupt Essence
- Dragon Tongue
- Step 1 Meister skill books
About:
An updated version of the party dungeon, this dungeon tasks you to challenge Binalle Fairie yourself. The creatures are weaker, but you have limited daily attempts, and no backup!
You'll sometimes find Dragon Tongue on the creatures here, with an improved chance that the first boss, Foreman King Digger will be carrying some. Dragon Tongue is needed to craft the Dragonic Perpetuus.
The path branches after the first boss, randomly taking you either to the Lab, where Verdia may hold the Sal Crystalline needed for your Perpetuus, but the other path leads to Conjurer Edward in Sap Storage, where you might find Corrupt Essence. Your path will be selected randomly, with both being equal, unless you spend a Super Pass to select your preferred route.
Binalle Fairie is the final encounter, and may drop either the Dragon Horn or the Dragon Claw. Unlike the party dungeon, you don't need to use Dream Powder to reach the hidden boss for a chance at the Dragon Horn.
Undo Mazoukie’s Training
Level: 180+
Map: Space of Pilgrimage
Entry Fee: Undo Mazoukie’s Training Entry Ticket
1st/day – 200,000 DIL
2nd/day – 300,000 DIL
3rd/day – 400,000 DIL
4th/day – 2 Super Pass
Time Limit: 15 minutes
Rewards:
- Helpyron’s Weapon Ex-Box
- Helpyron’s Armor Ex-Box
- Helpyron's Bracelet +7 Ex-Box
- Helpyron's Belt +7 Ex-Box
- Condensed Copper/Silver/Gold Argates
- Sardonyx 25
- All Defense 67
- Medial 159
About:
The renowned warrior who guards the Space of Pilgrimage, Undo Mazoukie, has an endless well of power and knowledge to grant those who stand against Karon. But his wisdom is sought after so highly that he only bestows it upon those who show themselves worthy.
When you undertake Undo’s training, you’ll be alone against waves of Undo’s disciples. If you prevail, you’ll have the privilege of sparring with Undo himself in one of six random arenas. Each arena adds a unique twist to your match against the master.
Karon's Transport Ship
Level: 185+
Map: Requies Beach
Entry Fee: Karon's Transport Ship Ticket
1st/day – 1,000,000 DIL
2nd-4th/day – 2 Super Pass
Time Limit: 20 minutes
Rewards:
- Nostalgic Pirate's Coin
- Fallen Sailor's Ring
- Submerged Sailor's Ring
- Shining Kardia
- Copper/Silver/Gold Argate
About:
Similar to the party dungeon, Karon's Transport Ship (Fresh), but it will be you alone against a succession of five bosses, climbing the ranks until you face off against first mate Death Talos, and the vile captain Death Herald.
Your first three battles will each be selected at random from two or three possible members of the demonic crew, but each has a chance of dropping the same items.
Colosseum Arena
Level: 190+
Map: Colosseum Lobby (Dein)
Entry Fee: 500,000 DIL + Colosseum Arena Entrance Ticket
5/day complementary
Time Limit: 15 minutes
Rewards:
- Title: Solo Champion - All ATT: 125
- Fight Ticket
- Champion’s Token
- Colosseum Champion’s Bracelet
- Colosseum God of War Bracelet
- Dragonoid Signet
- Ardeka socket 3%
- Improved Ardeca Socket Stone
- Disassembly Hammer
About:
If you aren’t the type who finds distasteful the concept of bloodsport, you can take part in a little unsanctioned melee combat.
You’ll be caged and deposited into an arena, along with a collection of criminals, mercenaries, and other ne’er-do-wells. When the whistle blows, your cage opens, along with several other combatants. Your goal is to stay alive! Even more cages will open periodically, so the odds are against you.
Success is rewarded in the form of Fight Tickets and Champion’s Tokens, which can be exchanged with Dein to upgrade the humble Blood Circulation Jade Bracelet that you received from Norak Secret Arena so long ago. You can upgrade your bracelet multiple times with additional tickets and tokens, but the final boost to either the Colosseum Champion’s Bracelet or the Colosseum God of War Bracelet is not guaranteed to succeed, so expect your gladiatorial career to be a long one. Rumours abound that the Colosseum Champion’s Bracelet itself can be obtained directly inside the Colosseum, but it appears so rarely as to be almost unknown.